As mentioned at the beginning of this chapter, eM Client's calendar supports multiple layout views. You can select a view type which suits your schedules the most. In this section, we will walk you through the individual view modes.
Before we start the tour through the individual views of the calendar, let us present one useful tip for calendar users - you can create a completely custom view by simply holding the Ctrl key and left-clicking on particular days in the small calendar window in the bottom left corner in order to select or deselect the days.
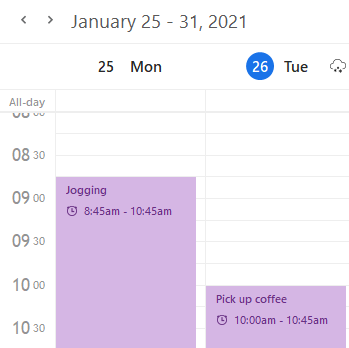
The day view is the most detailed as it focuses on the shortest period of time.
The arrows on top of the central panel switch between upcoming and previous days.
Next to the arrows is a label indicating which day (or week/month in the case of week view /month view) is currently selected and displayed.
Schedule in the central panel is divided into hours which are divided according to the value specified in the granularity drop down menu in Calendar preferences.
Calendar events are ordered in a vertical timeline. Each event is colored (you can pick any color you wish in the toolbar by clicking on Calendar Color) and contains the basic information (subject, start time, tag, recurrency and reminder settings).
Events that last the whole day or span several days are displayed in the upper section of the calendar, before the timed schedule (so that these events don't interfere with the daily schedule).
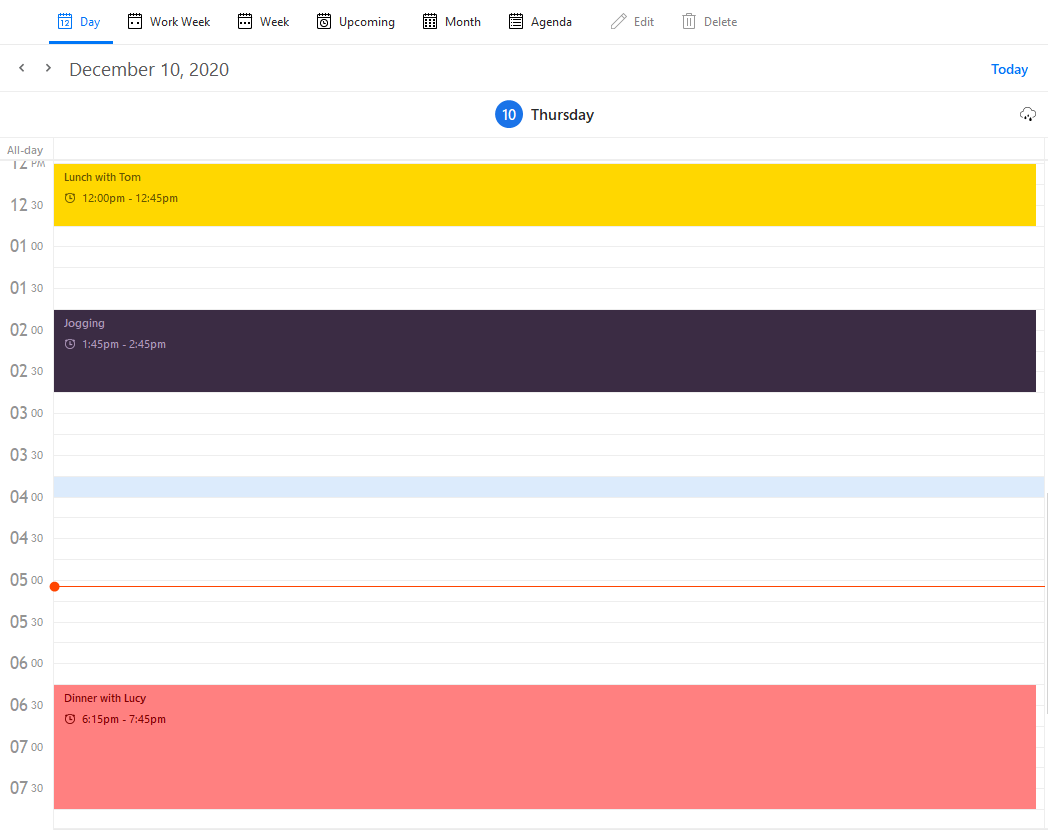
You can zoom in and out by holding Ctrl and using the scroll wheel. The layout of the calendar will expand or condense accordingly.
Events in the main panel can be drag-and-dropped on a different time or resized to a different length.
To move an event, click on an event box with the left mouse button and drag the event on another time and release the mouse button.
To extend or reduce the duration of an event, move the pointer to the upper or lower area of an event and after the pointer changes its shape, click the left mouse button and resize the event as necessary.
Moving events to a diferent date - events can be drag-and-dropped to the small calendar on the left. This smart utility is very useful in case you want to change the date of the event but you want to keep the same time schedule - just drag and drop the event on the desired date.

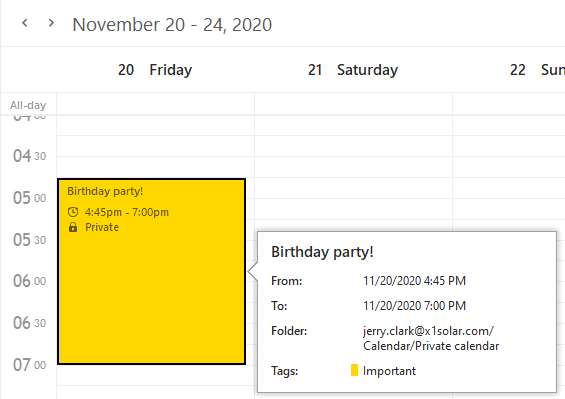
If you hover the mouse pointer over an event, a pop up balloon tooltip will appear, showing event details, including subject, start time, end time and description. This also works in the week view and month view.

All the functions offered in Day View can be found in Week View, the only difference is that the Week View displays one week at a time. If you want to see the schedule for workdays, select Work Week View in the calendar's toolbar. You can also zoom in and out by holding Ctrl and using the scroll wheel. The layout of the calendar will expand or condense accordingly.

Work Week View is the same as Week View except that only the days which you have set up as work days will be displayed. To set up your work week go to Menu -> Settings -> Calendar.

Upcoming View is the same as Week View except it shows today and the next 6 days.
The Month View layout allows you to see the events of the entire month.
Events that last less than a single day are ordered the same way as in the other layouts. Daylong and multi-day events are displayed before other short events and are sorted by their starting time. Notice that today's date is highlighted - this has been added for easier orientation in the month view layout.
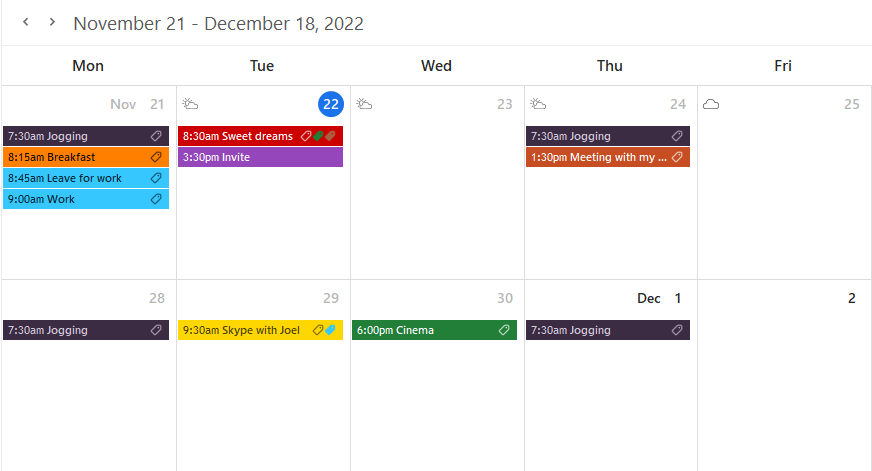
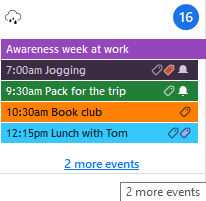
Days that contain more events than what can fit into their window will have three little dots displayed in the upper right corner (see picture below). Hover over the three dots to see how many events are hidden.

This layout does not display events in a calendar but instead in a comprehensible list of events, with each line containing the details of a single event.
By default, events are ordered by their starting dates. Recurring events are listed only once, at the time of their first occurrence.
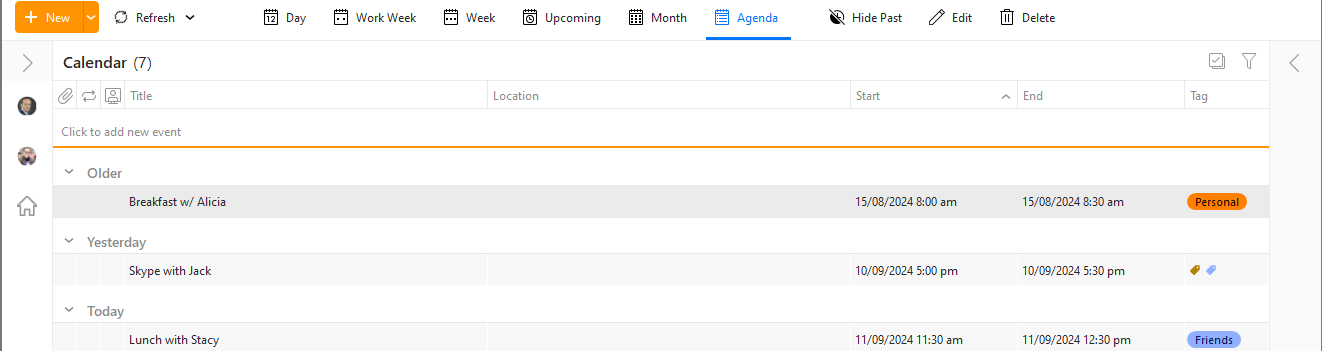
This view is particularly useful when searching for particular events. It allows you to arrange events by different parameters by simply clicking on a column header. Click on the column header again to switch between ascending and descending orders.
You can customize the List View by right-clicking at the column heading. Select Columns configuration.
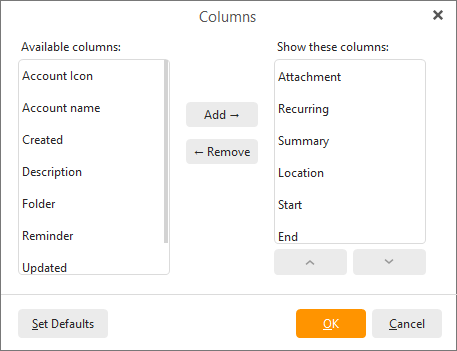
Add the columns you would like to see in your List View window by selecting them and pressing Add. You may also arrange the order in which the columns are displayed by first selecting a column heading and pressing Move Up or Move Down.
You can also resize the width of columns by clicking between two columns in the table header and dragging the cursor right or left as needed.
Hide Past button
Hide Past button automatically hides all the events in calendar that are out of date.